How to Fill In Sparse Brows So They Still Look Like Yours
The best brows never look "done". They look like your own, just a little fuller, a little neater, and framing your face the way they did on your best brow day. The difference between that and a heavy, drawn-on brow is not talent. It is technique: the right shade, the right strokes, and knowing when to stop.
This guide walks you through a simple routine for filling in sparse brows naturally, and shows how the Feather Filler Brow Pen makes each step faster.
Why Filled-In Brows Can Look Fake
Most brow mistakes come from treating the brow as a shape to colour in, rather than a group of individual hairs. When you draw a solid outline and fill it, the result reads as flat and heavy, especially in daylight. Real brows are made of fine lines of different lengths, with skin showing between them, and they are softer at the front than at the tail.
So the goal is not to cover your brow. It is to add the hairs that are missing, in the same direction as the ones you already have.
Key takeaway: Think "add hairs", not "draw a shape". Fine strokes in the direction of growth always look more natural than a filled outline.
Step 1: Choose the Right Shade
Match the shade to your natural brow hair, not your head hair. Brows are usually a touch lighter than they look in the mirror, and a shade that is too dark is the fastest way to a harsh result.
- Light brown: for light brown to dark blonde brows, or when you want a soft, airy finish.
- Medium brown: for medium brown brows. The everyday middle ground.
- Dark brown: for dark brown to black brows, or a more defined look.
If you are between two shades, go for the lighter one. You can always build colour up, but it is harder to take it away.
Step 2: Brush Your Brows Up
Before you add anything, brush your brow hairs up and slightly outwards. This shows you exactly where the gaps are and how your hairs naturally grow. The Feather Filler has a spoolie on one end for exactly this, so you do not need a separate brush.
Step 3: Flick, Don't Draw
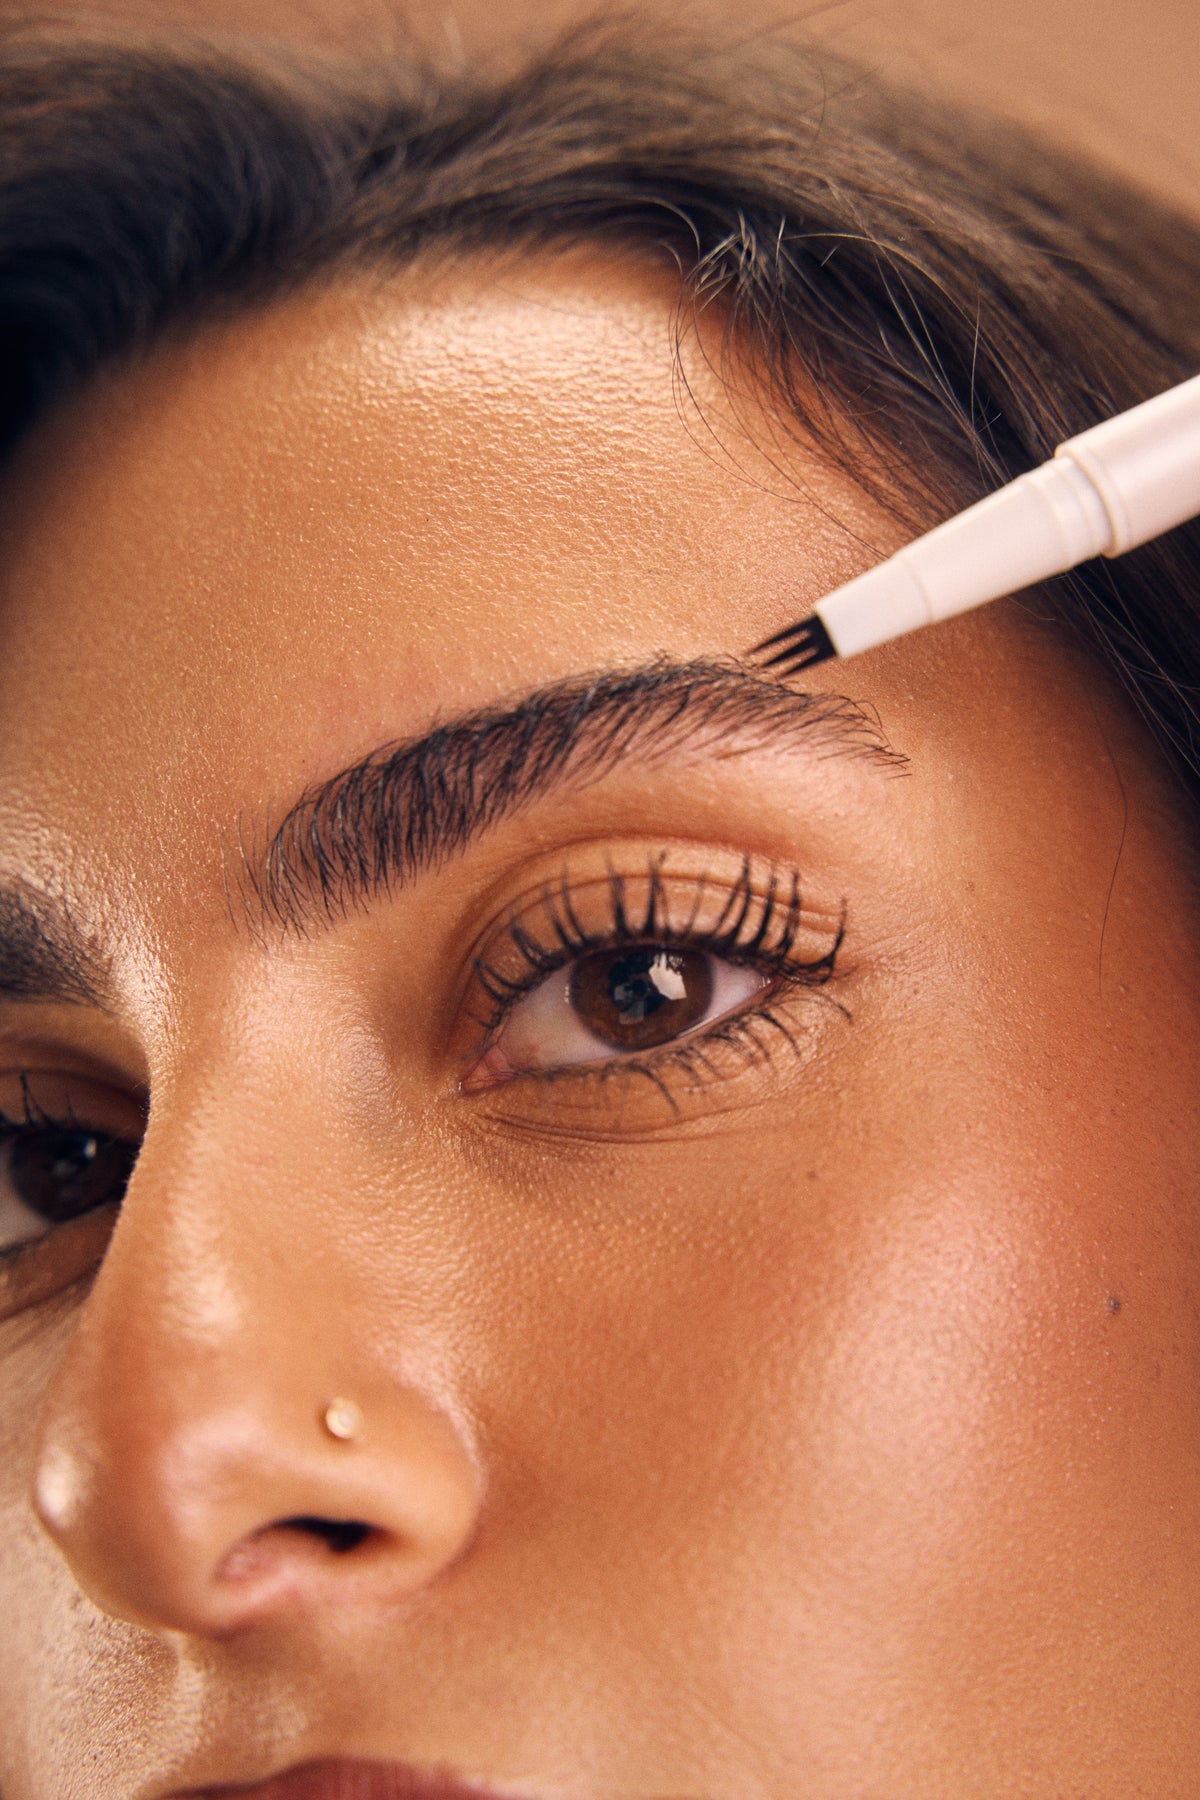
Hold the pen lightly, near the end, so you cannot press too hard. Then make short, quick flicks in the direction your hairs grow: upwards at the front of the brow, and angled outwards along the top and tail.
This is where the Feather Filler's triple-tip brush helps. Each flick lays down three fine, hair-like strokes at once, so you fill and shape your brows in fewer passes. The soft silicone tips glide over your brow hairs without tugging, which makes it easier to keep a light, even touch.
- Start in the middle of the brow, where most people have the most hair, and work outwards.
- Keep the front of the brow (closest to your nose) the lightest. A few upward flicks are enough there.
- Use slightly longer, more angled strokes towards the tail.
Key takeaway: Light pressure and short flicks give you hair-like strokes. Heavy pressure and long lines give you a drawn-on brow.
Step 4: Build Only Where You Need It
Step back from the mirror and look at both brows together. Add strokes only where the brow looks sparse or where the shape breaks. It is normal for one brow to need more work than the other, since very few faces are perfectly symmetrical.
Step 5: Soften With the Spoolie
Finish by brushing through once more with the spoolie end. This blends the strokes into your natural hairs, softens any line that looks too sharp, and sets the hairs in place. It is the step most people skip, and the one that makes the biggest difference.
Common Brow Mistakes to Avoid
- Outlining first: a hard outline is difficult to soften. Build the shape with strokes instead.
- Going too dark at the front: it makes brows look heavy and severe. Keep the front softest.
- Pressing hard: it creates thick, solid lines. Let the tips do the work.
- Skipping the brush-through: unblended strokes can look sharp. Always finish with the spoolie.
Frequently Asked Questions
How do I make filled-in brows look natural?
Use a shade close to your natural brow hair, make short, light flicks in the direction your hairs grow, keep the front of the brow lightest, and brush through with a spoolie at the end.
Which brow shade should I choose?
Match your natural brow hair rather than your head hair. If you are between two shades, choose the lighter one and build it up where needed.
What is a triple-tip brow pen?
It is a brow pen with three fine tips, so each stroke creates three hair-like lines at once. That means you can fill and shape your brows with fewer passes.
Ready to try it? The Feather Filler Brow Pen comes in Light brown, Medium brown and Dark brown, with a triple-tip brush on one end and a spoolie on the other.